

Bright, sun-filled rooms come with a trade-off: heat buildup, faded furniture, and harsh glare. A residential window tinting installation offers a practical fix without replacing your windows or blocking the view. It reduces heat buildup, cuts glare, and adds privacy while keeping the glass looking clean and clear. According to the International Window Film Association, a nonprofit trade body that sets standards for the industry, professional film installation is designed to be quick and unobtrusive, which is good news if you have been putting the project off out of concern for the hassle.
Many homeowners feel a little unsure about the process before they schedule it, and that is completely normal. Knowing each step ahead of time makes it easier to prepare the home, set realistic expectations, and enjoy the results once the crew has packed up.
This guide walks through preparation, the installation itself, curing, aftercare, and cost factors, so you have a clear picture before the work even begins.
Key Highlights
- Clearing the area around each window helps the crew work quickly and safely.
- Clean glass is the foundation of a smooth, bubble-free finish.
- Precise measuring, cutting, and application create a professional look on every window.
- Curing takes time, and the film may look hazy for a few days.
- Cost reflects window count, film type, shape, and accessibility.
What Should You Do Before a Residential Window Tinting Installation?
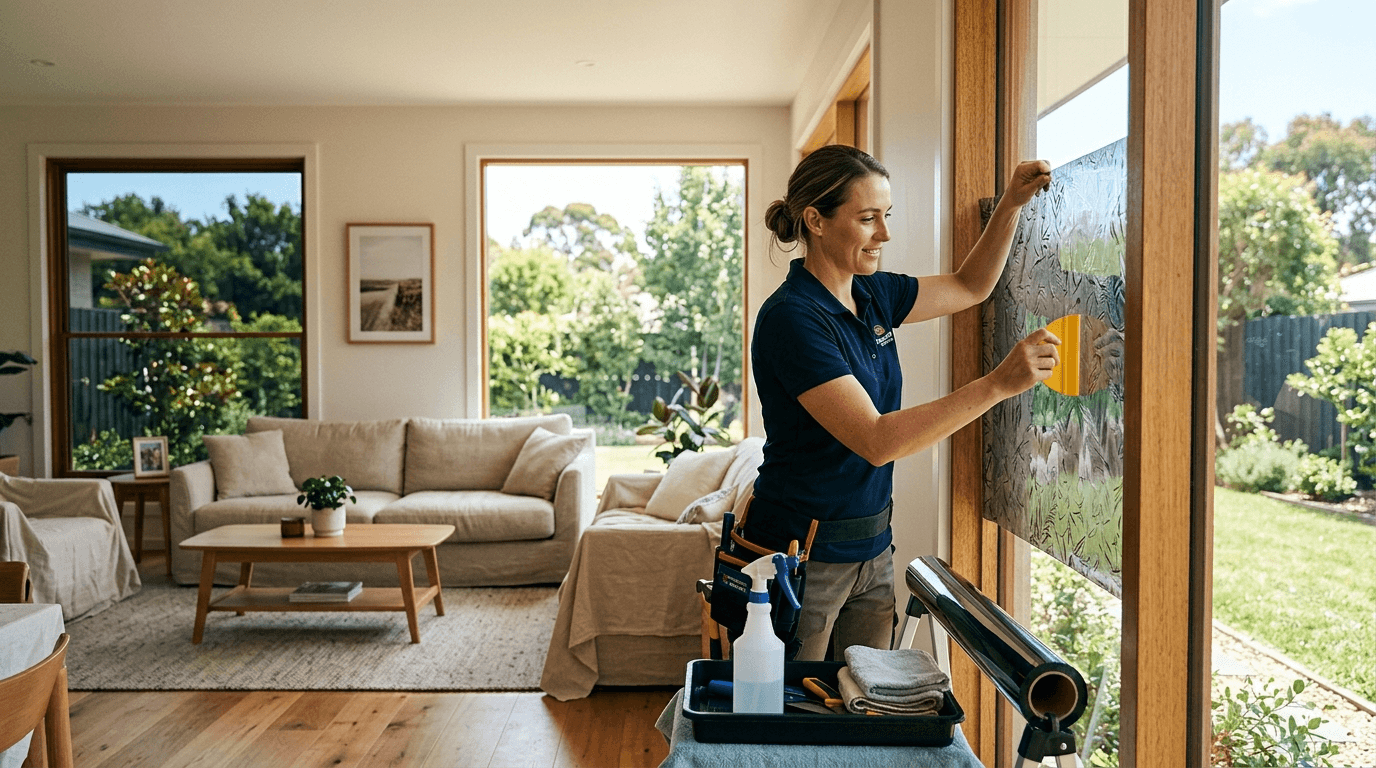
A little preparation on your end makes installation day go a lot smoother. A few simple steps give the crew clear access and keep your belongings protected.
Clear the Area Around Your Windows
Furniture, plants, and decorations should sit several feet away from each window before the crew arrives. Curtains, blinds, and hanging items come down for the day. Window sills should stay clear of frames, candles, and small objects so the glass remains fully accessible from every angle.
Discuss Your Window Tinting Goals
Take a few minutes to talk through what you actually want the film to do. Heat reduction, glare control, UV protection, and privacy each point toward a different type of film. These goals guide the selection process, so it helps to share your priorities early. A room that overheats every afternoon needs a different solution than a bathroom that just needs a bit more privacy, which is something our residential window tinting team can walk you through before anything is ordered.
Inspect the Existing Glass and Frames
Each window deserves a quick look before the crew shows up. Cracks, chips, foggy seals or loose frames should all be noted ahead of time. Existing damage can affect how the film sits on the glass, so flagging issues early means they get addressed first, rather than discovered mid-installation.
How Does Residential Window Tinting Installation Work?
Quality window tinting starts with careful preparation, precise application, and attention to every detail.
A residential window tint installation follows a clear, repeatable sequence. Each step supports the next, and a little extra precision at every stage produces a clean, lasting result. Before starting your project, reviewing the pros and cons of window tinting can help you understand the benefits and considerations of adding film to your home.
The Windows Are Thoroughly Cleaned
The crew removes dust, dirt, grease, and residue from the glass before anything else happens. Clean glass is essential because film bonds directly to the surface underneath it. Even tiny specks trapped under the film will show up as bumps or bubbles later, so this step is never skipped.
The Tint Film Is Measured and Cut
Each window gets measured individually rather than by a general estimate. Homes have different window sizes and shapes, from standard sliders to tall picture windows and arched openings. Precise measurements let the film cover the full pane without gaps or overlap.
The Film Is Carefully Applied
The installer sprays the glass with a solution, positions the film, and slides it into place by hand. Specialist tools help align the film squarely against the pane. This wet application is what lets the crew make small adjustments before the film sets for good.
Excess Moisture and Air Are Removed
Using a squeegee, the installer presses out water and trapped air from under the film. Working from the center outward smooths the surface evenly. This step is what minimizes bubbles, creases and cloudy patches, and it is one of the reasons a steady, experienced hand matters so much here.
The Edges Are Trimmed and Finished
The crew trims the film precisely around the frame, leaving a small, industry standard gap rather than pushing the film edge to edge. A neat edge sits flush against the glass without curling or peeling. Clean edges give the window a finished, professional appearance rather than a homemade one.
Each Window Is Inspected
Finally, the installer checks coverage, edges and overall clarity on every single window. Any small imperfection gets a final adjustment right there. This last look confirms the whole home meets the standard before the crew leaves for the day.
How Long Does Home Window Tint Installation Take?
Timing varies quite a bit from home to home. A few factors shape how long a home window tint installation actually takes from start to finish.
Installation Time Depends on the Number of Windows
More windows require more time and more material. A handful of rooms may take a couple of hours, while a whole house project can easily fill most of a day.
Window Size and Shape Can Affect Installation Time
Large, arched or hard to reach windows slow the process down. Second story glass or windows sitting behind fixed furniture also add time to the job. Custom shapes just need extra care when cutting.
The Film Requires Additional Time to Cure
Installation and curing are two separate stages, and it helps to think of them that way. The crew finishes applying the film in one visit, but the film keeps drying for days afterward. Temporary haze or small water pockets may appear during curing, and they clear up on their own as the moisture evaporates.
What Affects Home Window Tint Installation Cost?
Pricing reflects several variables rather than a flat rate per window. Knowing them ahead of time makes planning for home window tint installation cost a lot easier, with fewer surprises along the way.
The Number and Size of Windows
More glass simply means more film and more labor. A larger home naturally costs more than tinting a few select rooms.
The Type of Window Film Selected
Film quality, performance, and added features all affect price. Ceramic and spectrally selective films sit at the higher end because they block more heat and UV while keeping the glass clear. The U.S. Department of Energy notes that advanced window films can selectively control solar radiation while maintaining high levels of visible light and clear views. Basic dyed films cost less but offer lighter performance in return, something worth weighing if you are also comparing film against a full window replacement for older glass.
Window Shape and Accessibility
Complex shapes and hard-to-reach windows increase labor time. Arched, angled, and high windows simply take longer to fit correctly than a standard rectangular pane.
Professional Installation Requirements
The price covers preparation, application, precise fitting, and finishing, not just the film itself. The table below shows how each factor influences cost.
Why Choose Professional Home Window Tinting?
DIY kits exist, and they can look tempting on a budget. But professional home window tinting delivers results that actually last, and the difference shows up in preparation, precision, and product knowledge.
Professional Preparation Supports Better Adhesion
Proper cleaning and surface prep reduce application problems before they start. A trained crew removes contaminants that home tools tend to miss, which helps the film bond evenly across the whole pane.
Precise Application Creates a Cleaner Finish
Professionals bring the right tools along with a steady, practiced technique. Their experience produces straight edges and a smooth surface across every window in the home, not just the easy ones.
The Right Film Can Match Your Home's Needs
An experienced installer helps match film to heat, glare, UV and privacy needs based on how each room actually behaves throughout the day. That guidance keeps a window tint home installation aligned with your real goals rather than a guess made off a sample swatch.
Professional Installation Helps Protect Your Investment
Correct application and clear maintenance guidance extend the life of the film considerably. Many quality films carry warranties that only remain valid with professional installation, which is worth checking before you buy anything.
The comparison below weighs professional installation against a DIY approach.
What Should You Do After Installing Tint on Home Windows?
Proper aftercare protects your investment and helps your window film maintain its appearance over time.
Aftercare shapes the final result just as much as the installation day does. A few habits protect the film while it settles into place. These steps apply right after installing tint on home windows.
Allow the Film to Cure Properly
Curing time varies by film type, temperature, and humidity, so patience matters here. Warm, dry conditions can speed the process along, but several days is a safe general expectation for most residential films.
Avoid Touching or Disturbing the Film
The newly applied film should be left alone during this window. Pressing, scratching or peeling at the edges can shift the film before it has fully set. Pets and curious hands should stay away from the glass for the first few days.
Follow Recommended Cleaning Practices
Cleaning waits until the film fully cures, not before. Once it is ready, gentle, non-abrasive methods work best going forward. A soft cloth and a mild solution keep the surface clear without scratching the new film.
How Can You Maintain Residential Window Tint?
Good maintenance keeps the film looking new for years after the installation crew has left. Simple, consistent care goes a long way.
Use Appropriate Cleaning Materials
A soft microfiber cloth and a mild, ammonia free solution work well on tinted glass. Gentle products protect the film surface every time you clean.
Avoid Abrasive Tools and Harsh Products
Scrubbing pads, razor blades and ammonia based cleaners should be avoided entirely. These can scratch, cloud or lift the film over time, undoing what a good installation set out to achieve.
Follow Manufacturer and Installer Recommendations
Every film comes with its own specific care instructions, and they are worth holding onto. Following the guidance your installer provides gives you the best long term result, and if you are weighing tint against a broader upgrade, our guide to choosing the best window glass for your home is a helpful next stop.
When Is Professional Window Tint Installation Worth It?
Tint pays off most in certain situations, and these scenarios come up often across Arizona homes.
Homes With Excessive Heat or Sun Exposure
South and west facing rooms bake in the afternoon sun more than any other part of the house. Tint reduces incoming heat and noticeably improves indoor comfort during peak sun hours.
Glare-Prone Rooms
Glare on screens and surfaces distracts and strains the eyes, especially in home offices and living rooms with large windows. Film cuts glare while still keeping the room bright and open.
Homes Requiring Additional Privacy
Privacy-focused films limit the view inside without blocking the view out. They suit street-facing rooms and bathrooms particularly well, where curtains alone can feel like overkill.
Protecting Interior Furnishings
UV protection slows sun-related fading on floors, art, and furniture over time. That protection helps preserve the color and value of an interior that would otherwise fade unevenly year after year.
FAQs
How long does residential window tinting installation take?
Most projects take a few hours to a full day. The total depends on the number, size, and accessibility of the windows involved.
How long does residential window tint take to cure?
Curing usually takes several days to a few weeks. Warmth and sunlight speed the process along, and any temporary haze clears as the remaining moisture evaporates.
Can you install window tint on existing home windows?
Yes, film applies directly to your current glass. An installer checks the condition of the glass and frames first, since cracks or failing seals can affect how well the film performs.
Will my new window tint look cloudy or bubbly right after installation?
A slight haze or small water pockets right after installation are normal and expected, not a sign of a bad job. These clear up on their own as the film finishes curing over the following days.
How much does home window tint installation cost?
Cost depends on the film type selected, the accessibility of each window, and the finishing work involved. A custom quote reflects the specifics of your home rather than a flat, one-size-fits-all price.
Can window tint be removed later if I change my mind?
Yes, film can be removed by a professional without damaging the glass underneath. This is worth knowing if you are testing out a lighter shade for privacy or heat control before committing to a heavier film.
What to Keep in Mind About Residential Window Tinting?
A window tinting project moves from preparation to cleaning, precise application, curing, and aftercare, with each step supporting a clean, lasting result. Professional installation can help protect your comfort, view, and interior furnishings for years to come.
Contact Demers Glass to discuss your residential window tinting needs.